
Table of Contents
This page provides step-by-step instructions for installing the imperix CPP SDK. It also provides guidance for importing the user template into the Integrated Development Environment (IDE). This page finally shows how to compile the template, which serves as a practical test to confirm that the software development environment has been installed correctly.
Installing the software
After registration, the CPP SDK installer can be downloaded directly from imperix’s website, at https://imperix.com/downloads/. CPP SDK users should then execute the installer and follow the on-screen instructions.
C:\imperix\CPP_SDK and be careful to avoid spaces or special characters in the pathname.Retrieving the user template
Launching the imperix IDE
The imperix IDE can be launched by searching for “imperix C++ IDE” in the Windows Start menu or by using the desktop shortcut. The first launch of the IDE can be slower as the software must perform preliminary configurations.
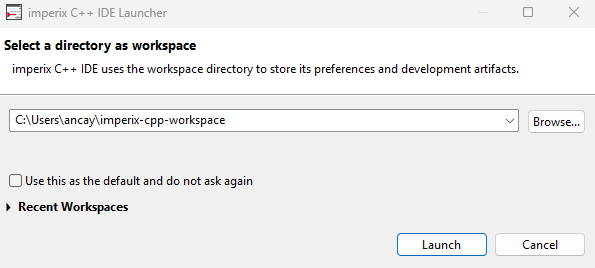
The IDE will then prompt for the selection of a workspace directory. This directory serves as the local repository where the software manages configuration preferences and projects. Clicking Launch will complete the initialization process.
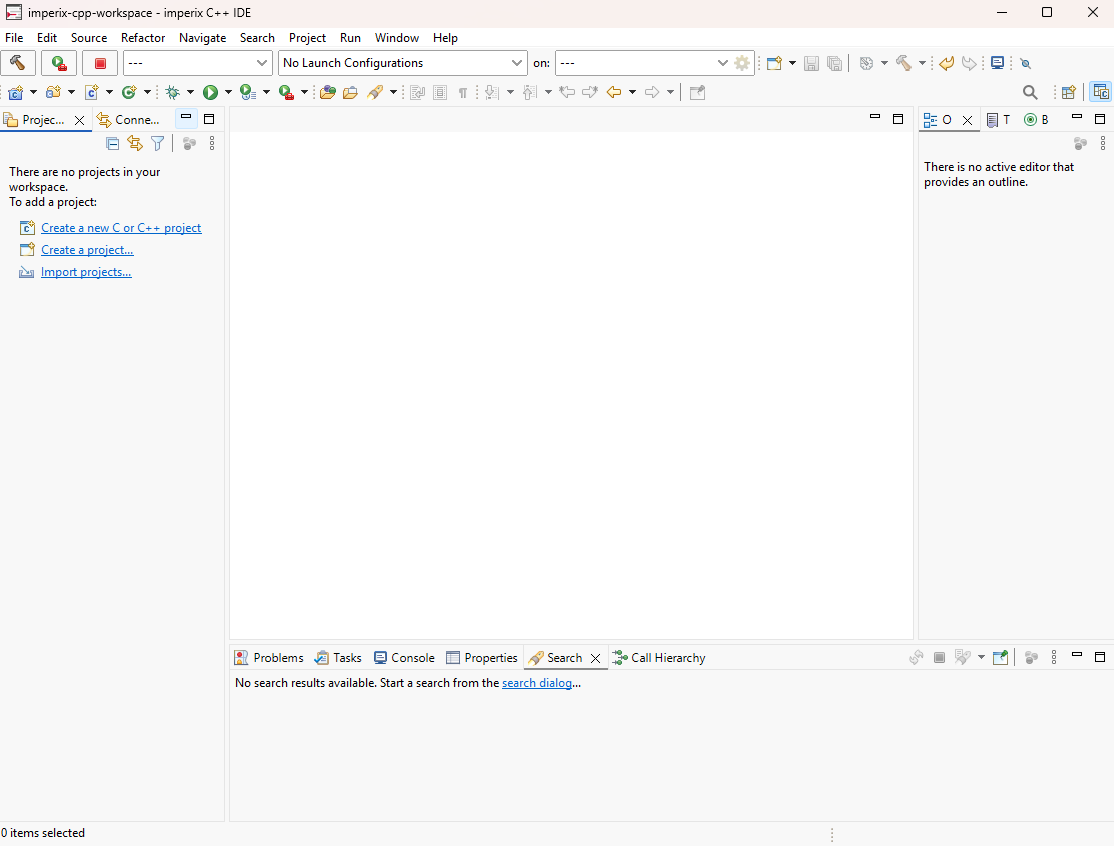
Once launched, the IDE displays the interface below.
Importing the user template
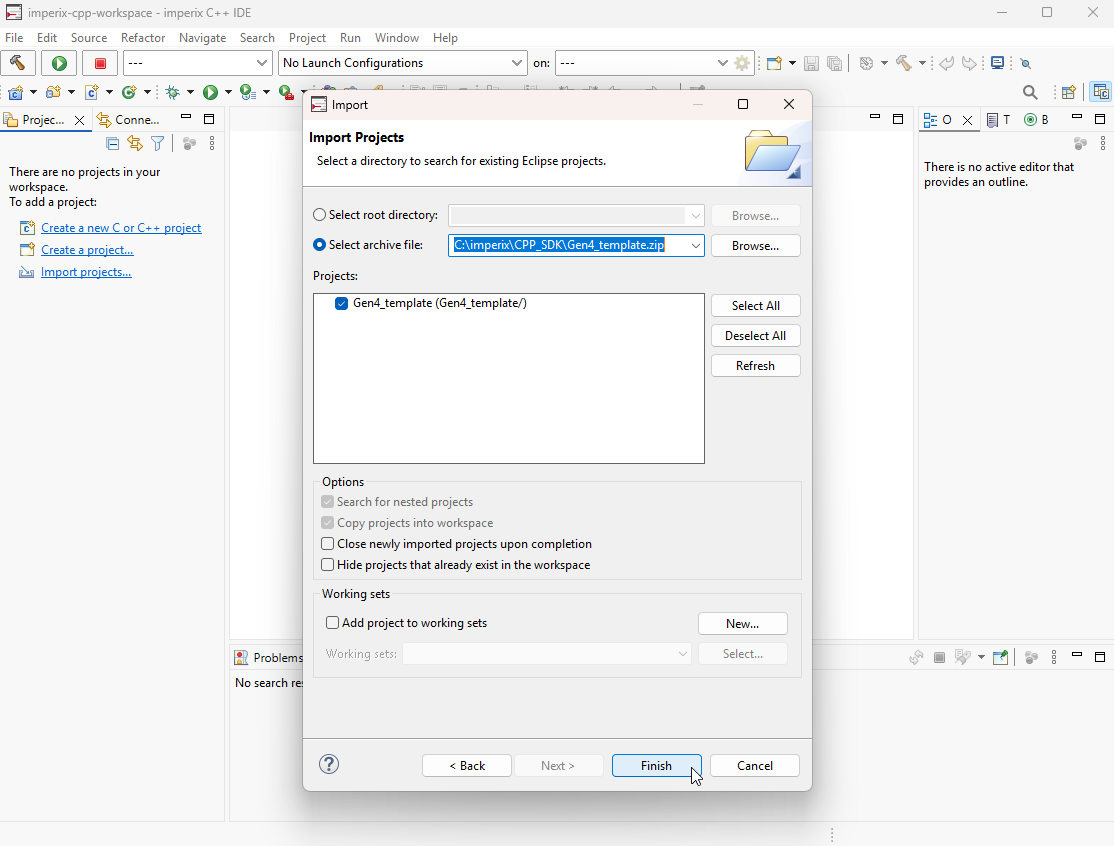
As a first step, the user template must be imported. Two versions of the user template are available, depending on the target hardware. The Gen4_template.zip must be used for the B-Box 4, while the Gen3_template.zip is required for the other imperix controllers, namely the B-Box 3 (RCP), the B-Box 3 micro, and the B-Board 3 (PRO). By default, both templates are located in the root of the SDK installation directory at C:\imperix\CPP_SDK.
The steps below detail how to import the selected user template into the workspace:
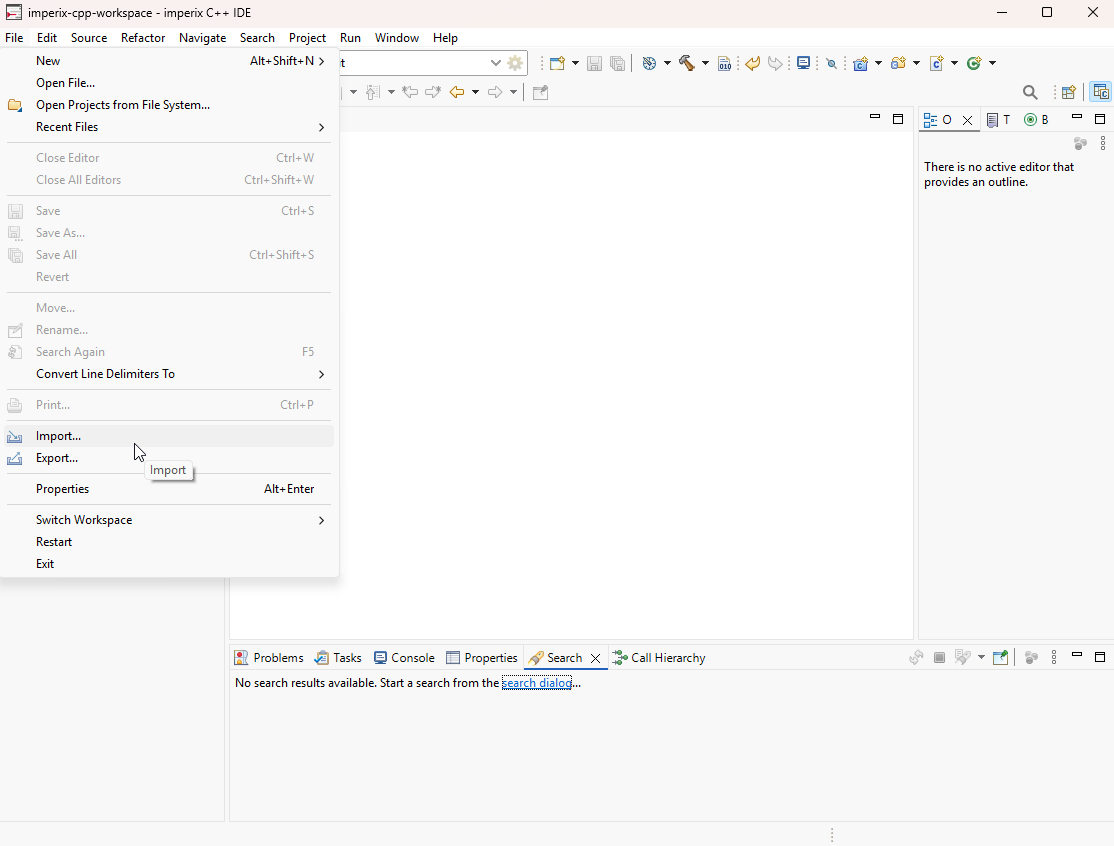
Select File -> Import…
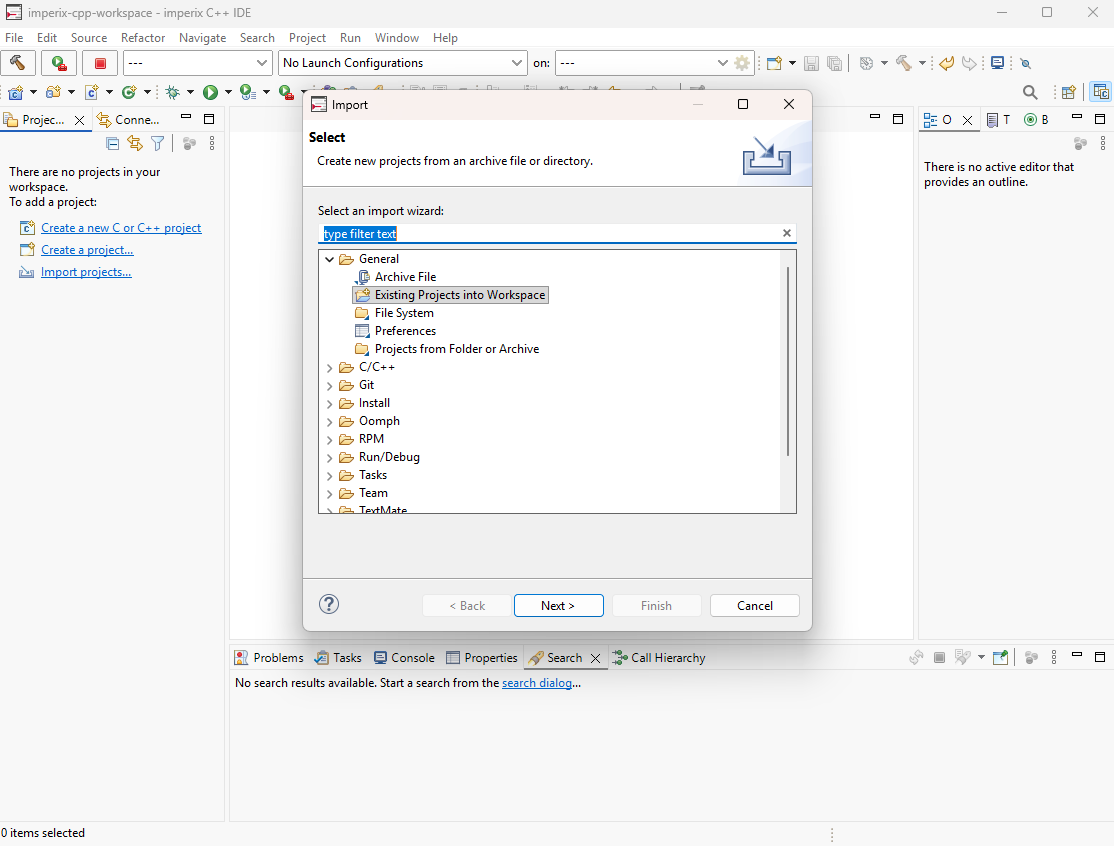
Under General, select Existing Projects into Workspace and click Next
Check the box Select archive file and browse the installation directory to find the zip file BB4_CPP_Template.zip or BB3_CPP_Template.zip and click Finish
Renaming the project
To rename the project:
- Right-click on the project, click Rename… (or press F2), and enter the new name
- It may be necessary to right-click on the project → Index → Rebuild
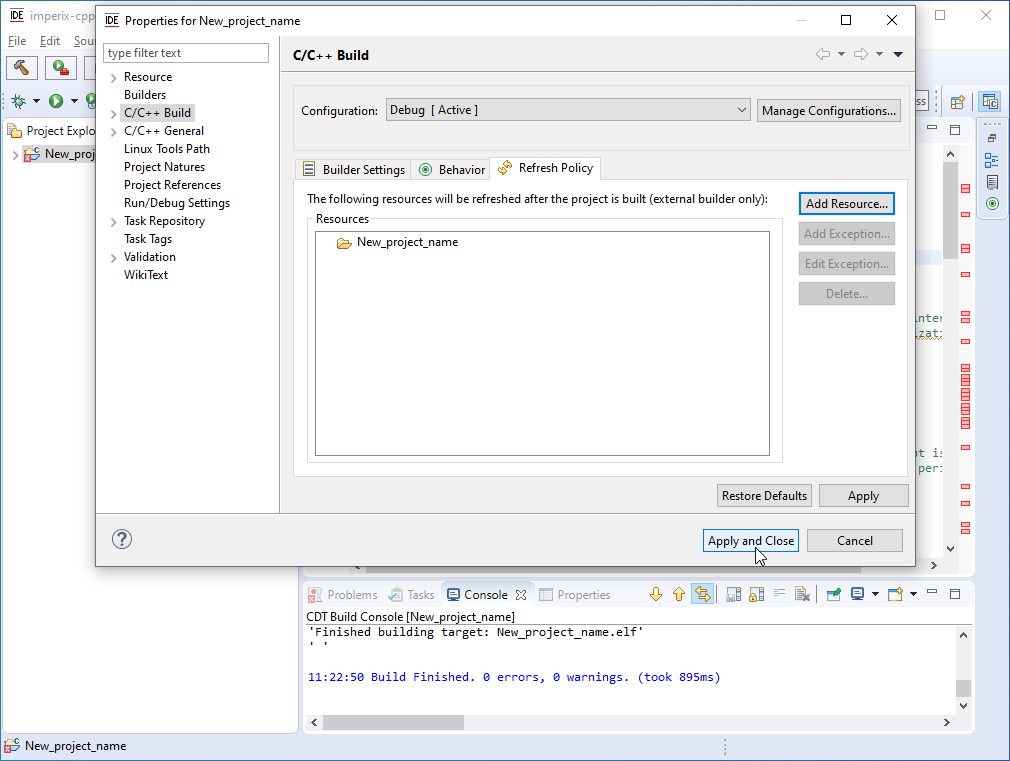
To rename the project with older CPP SDK versions, follow the procedure below. Due to an Eclipse bug, not following the procedure may lead to a resource is out of sync with the file system error.
- Right-click on the project, click Rename… (or press F2), and enter the new name
- Right-click on the project and click Properties (or press Alt+Enter)
- Click on C/C++ Build and select the Refresh Policy tab
- Delete the resource with the old project name
- Click Add Resource… and select the folder with the name of the project and click OK
- Click Apply and Close
- Right-click on the project → Index → Rebuild
Validating the installation
Once the user template is successfully imported, a test compilation can be executed to verify the proper configuration of the software installation.
Building the User Template
The compilation can be launched manually by clicking the “Build” icon at the top left corner of the IDE, or by pressing “CTRL+B”. The console window displays build information and any errors. The executable is generated in the “debug” folder (.elf file)
Flashing the code into the controller
The upload and flashing of the generated code onto the target are managed by Cockpit. To launch Cockpit, users can select the project in the project pane and click the Launch in ‘Run’ mode icon directly within the IDE, as shown below.
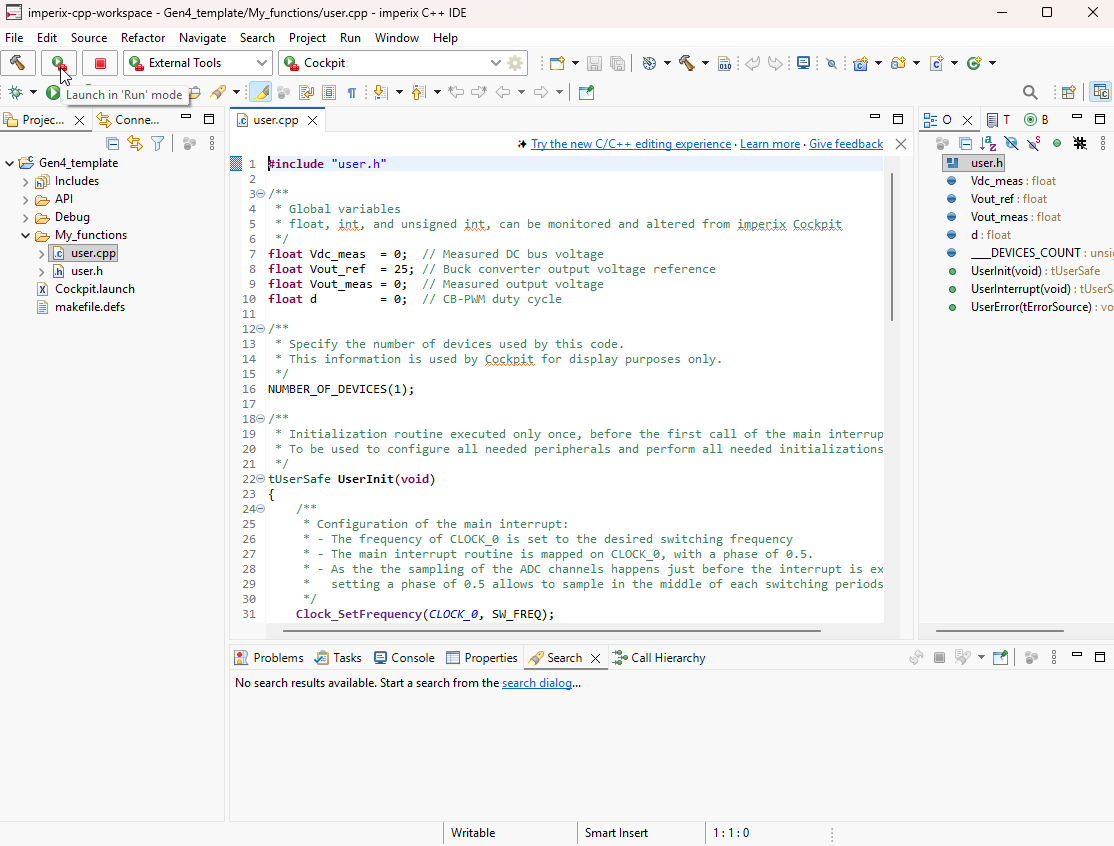
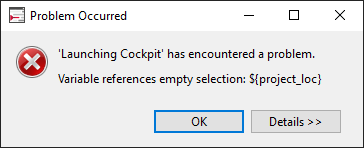
When the button Launch in ‘Run’ mode is clicked, the Cockpit launch configuration transmits ${project_loc} to Cockpit, this variable contains the path to the project. If no project is selected, then this variable is empty, and the above error message is displayed.
To avoid this issue, make sure your project is open and selected before clicking on the launch button.
If Cockpit opens automatically and prompts the user to create a new project, it indicates that the CPP SDK is correctly installed and fully operational. This concludes this installation guide for the imperix CPP SDK.
Further readings
The following further readings are recommended:
- Getting started with the CPP SDK includes instructions for first-time users of the CPP SDK
- Efficient programming with the CPP SDK provides programming insights specific to power electronics.
- Programming and operating imperix controllers addresses how to deploy the code on the hardware.
- The Cockpit user guide details how to use the monitoring software.
 By Jessy Ançay • June 25, 2026 • PN149
 By Julien Orsinger • September 20, 2022 • PN138