
Table of Contents
Imperix Cockpit provides a graphical interface for managing real-time control software running on imperix controllers. It supports a wide range of actions, from testing transient response and tuning control parameters to long-term monitoring and logging. While direct interaction with the software suits most experiments, highly iterative manipulations can still be tiresome.
Starting with version 2026.3, the ACG SDK and CPP SDK include a Python library that provides programmatic access to Cockpit. This enables fully automated tasks in Cockpit using Python scripts. With them, users can easily run commands to repeat operations, make decisions based on collected data, and interface with third-party software. Scripting also enables automated data processing and export without manual intervention.
The API documentation provides ready-to-use code snippets and a complete reference of all available classes and methods. Respectively, this note introduces the basic structure of a script and explains how to run it either directly from Cockpit or from a standalone Python environment. A more complete, application-focused example is available in PN205 and demonstrates using Python to sweep controller parameters to tune a PI controller.
Choosing a Python scripting environment
Python scripts can be executed using Cockpit’s built-in launcher or from a standalone Python environment. The built-in launcher is recommended for evaluating the global approach, developing very simple scripts, or executing existing scripts without the overhead of installing additional software. Beyond that, switching to a dedicated Integrated Development Environment (IDE) with a standalone Python environment is highly recommended.
Cockpit’s built-in script launcher
Cockpit’s script launcher requires zero configuration. The execution environment and the Python library are bundled in the SDK, meaning there is no need to install Python or configure system paths separately.
However, Cockpit does not include a code editor, so scripts must be written in a separate text editor, such as Notepad++. Additionally, execution is limited to a single .py file at a time.
Standalone Python environment
Setting up a standalone Python environment enables using dedicated IDEs such as VS Code. The initial setup is slightly more involved, as it requires installing Python independently, choosing an IDE, configuring a working environment, and manually installing the imperix Python library. On the other hand, these editors provide syntax highlighting, intelligent auto-completion, debugging tools, and support for structuring complex, multi-file projects, resulting in a much better user experience overall.
Launching Python scripts from Cockpit
In Cockpit, the Python script launcher can be accessed by navigating to the Python scripting tab and selecting Launch script.
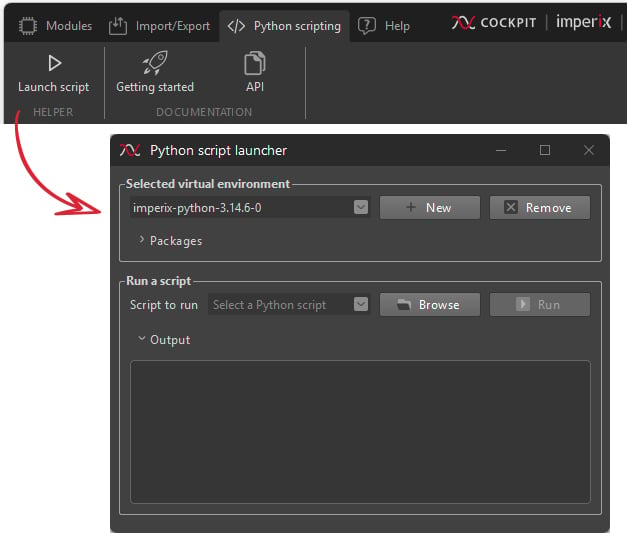
The script launcher window allows creating virtual environments. A Python virtual environment is an isolated workspace where scripts run. Each environment uses its own Python version (e.g. 3.14.6 in the screenshots) and its own set of packages.
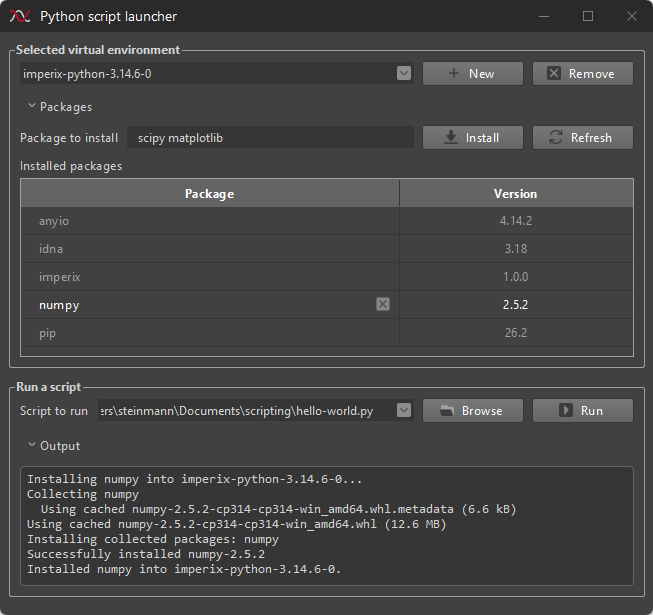
Virtual environments created from Cockpit already include the imperix library. If additional packages are required, they can be installed via the Packages area.
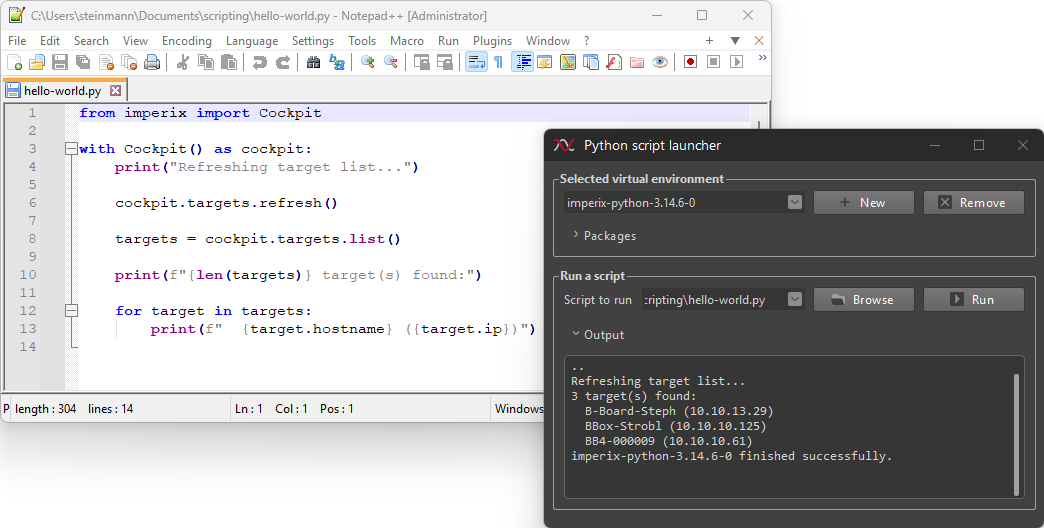
The hello-world.py script provided below illustrates the basic structure of an imperix Python script and provides a simple way to verify that the scripting environment works correctly. This script instructs Cockpit to refresh its target list, retrieves the list of detected targets, and displays their hostnames and IP addresses, similar to the list shown in the Targets perspective of Cockpit.
from imperix import Cockpit

with Cockpit() as cockpit:
    print("Refreshing target list...")
    cockpit.targets.refresh()

    targets = cockpit.targets.list()
    print(f"{len(targets)} target(s) found:")

    for target in targets:
print(f" {target.hostname} ({target.ip})")To run the Hello World example, or any other script, follow these steps:
- Select a virtual environment. If none exists, create a new one.
- For this example, no extra packages are required. If another script is being run and requires additional packages, make sure to install them.
- Create a new file named
hello-world.pyusing a text editor (e.g., Notepad++) and paste the code from the code snippet above. - Browse to select the newly created
.pyscript, then click Run. At this point, the list of available targets should be displayed in the output window.
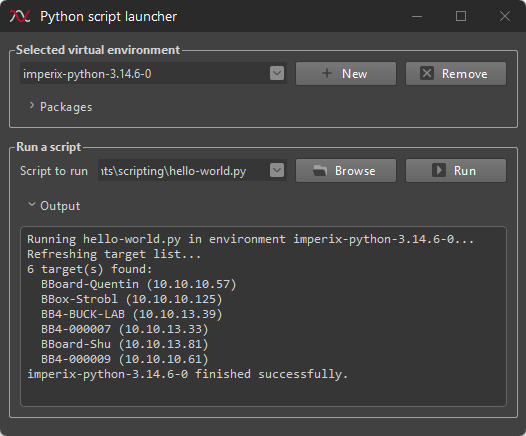
hello-world.py executed from the script launcherSetting up a standalone Python environment
Configuring an external Python environment is a prerequisite before integrating an IDE such as VS Code.
Installing Python
The imperix Python library requires Python 3.11 or later. It can be installed by following the official Python guide for Windows.
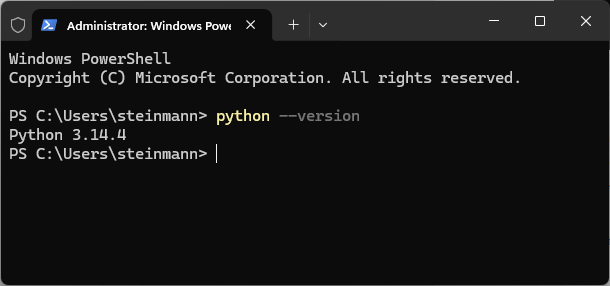
To verify that Python was properly installed, open a terminal (either Command Prompt or PowerShell) and run the following command:
python --versionIt should display the active Python version. If Python is missing or not added to the system PATH, an error will indicate that the term “python” is not recognized. In this case, the troubleshooting section of the official guide may help to resolve it.
Creating a Python virtual environment
A Python virtual environment is an isolated workspace where scripts run. Each environment uses its own Python version and package set. Creating and activating Python virtual environments is optional but highly recommended, since it provides isolation between projects and consistency over time.
To learn more about virtual environments, refer to the official Python documentation.
To create and activate a virtual environment:
- Open a terminal in the project directory
- Right-click inside the folder and select Open in Terminal, or
- Navigate to the directory manually using:
cd C:\path\to\director- Create a virtual environment by running the following command. A folder named
.venvwill be created in the project directory.
python -m venv .venv- Activate it by running
.venv\Scripts\Activate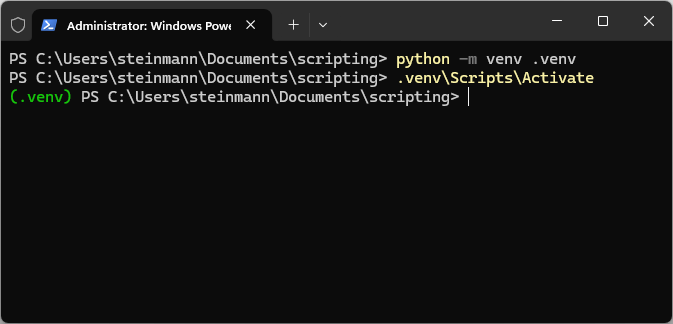
Once activated, the terminal prompt displays (.venv) at the beginning of the line. Packages installed via pip (Python’s package manager) are confined exclusively to the active virtual environment and will not affect the global system installation.
To exit the virtual environment, run: deactivate
If running
Activate.ps1 produces a PSSecurityException error, PowerShell might be blocking script execution. Allowing the execution of scripts can be done by running the following command:Set-ExecutionPolicy -ExecutionPolicy RemoteSigned -Scope CurrentUserAlternatively, Window’s Command Prompt (cmd) can be used instead.
See about execution policies to learn more.
Installing the imperix Python library
To install the imperix Python library, download imperix_python_library_vX.X.X.zip from the installation page and install using pip by running the following command. If using a virtual environment, make sure it is activated (the terminal prompt displays (.venv))
python -m pip install "C:\path\to\imperix_python_library_vX.X.X.zip"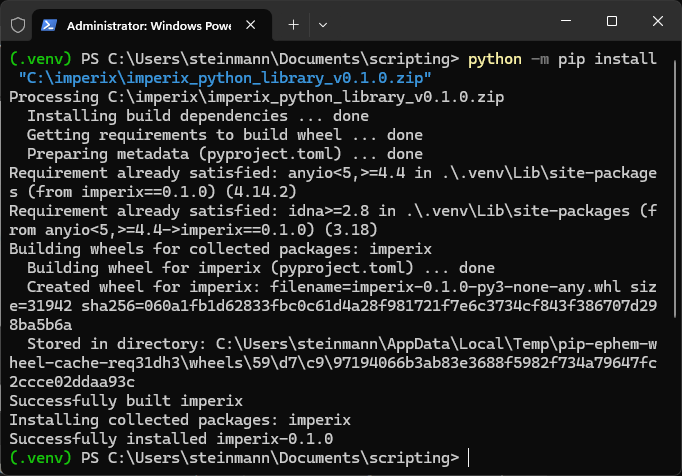
Running the Hello World script
To verify that everything was installed properly, run the Hello World script.
- Create a new file named
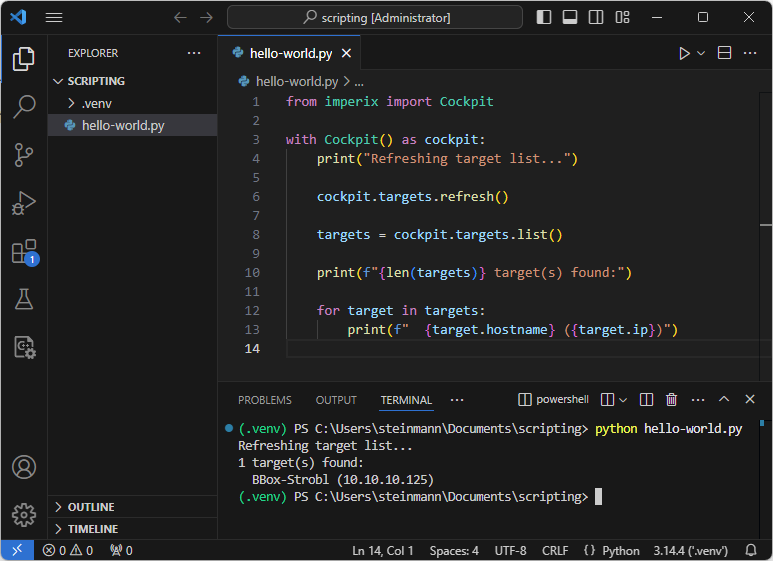
hello-world.pyusing a text editor (e.g., Notepad++) and paste the code from the code snippet provided above. - Run the script using the command below. The output should provide the list of available targets.
python hello-word.py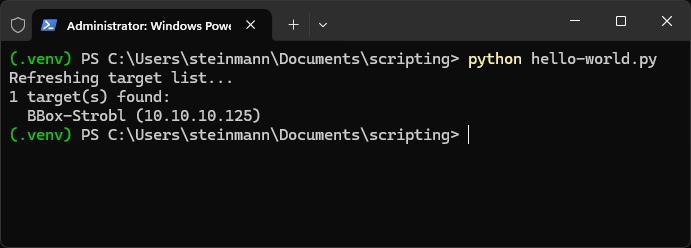
hello-world.py from a terminalWorking with Python in Visual Studio Code
Visual Studio Code (or VS Code) is an open-source code editor developed by Microsoft. This editor is used as an example, as it is currently the most widely adopted IDE for Python development. However, other popular IDEs, such as PyCharm or Spyder, can work just as well.
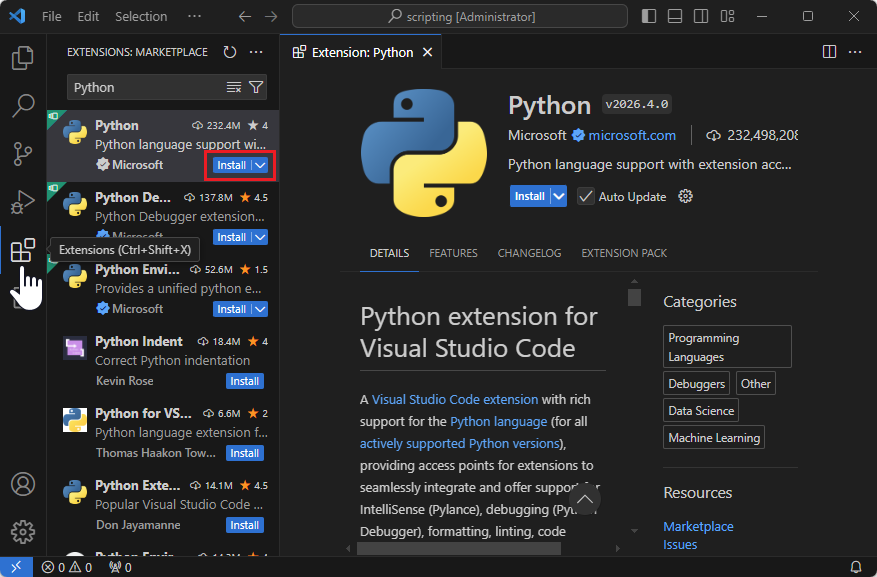
The installer is available from the official download page. After installing and launching the editor, the Python extension can be installed from the Extensions tab on the left (Ctrl+Shift+X). This extension provides code completion, debugging tools, and other features, which are described further in the Python in VS Code documentation.
Next, open or create a project folder (such as the directory containing hello-world.py) and launch a terminal there. A project folder serves as the working directory containing all Python scripts (.py) and the associated virtual environment.
- After installing the Python extension, close and reopen VS Code to make sure Python is properly detected
- Open a project folder by selecting
File > Open Folder - Open a Terminal by selecting
View > Terminal.
If the project folder contains a virtual environment, VS Code should automatically detect it and activate it, as illustrated below (the line starts with (.venv)). If not, the virtual environment can be manually selected as follows:
- Navigate to
Help > Show All Commands(or pressCtrl+Shift+P) - Type and select Python: Select Interpreter
- Choose the Python executable inside the
.venvfolder (e.g.,.\.venv\Scripts\python.exe).
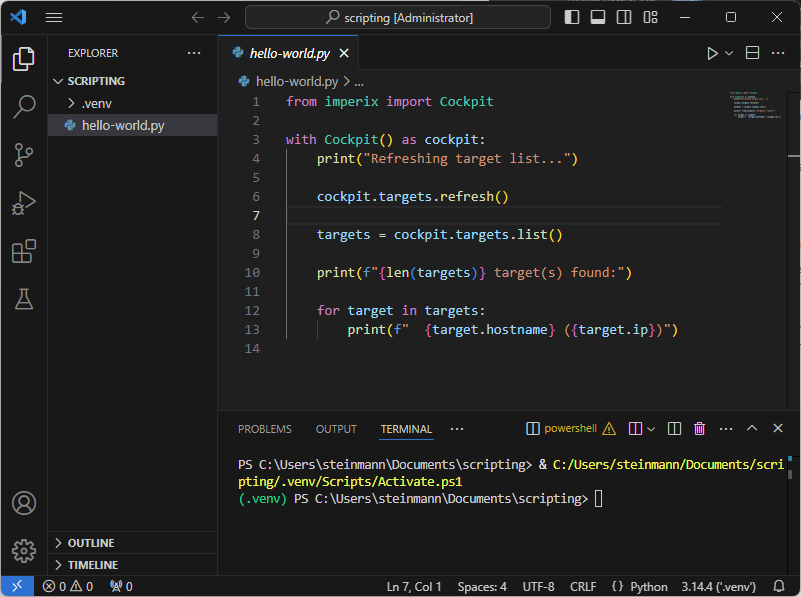
.venv is detected and automatically activated)To verify the installation, run the hello-world.py script using the following command. Alternatively, click the play button (▶) on the top right.
python hello-world.py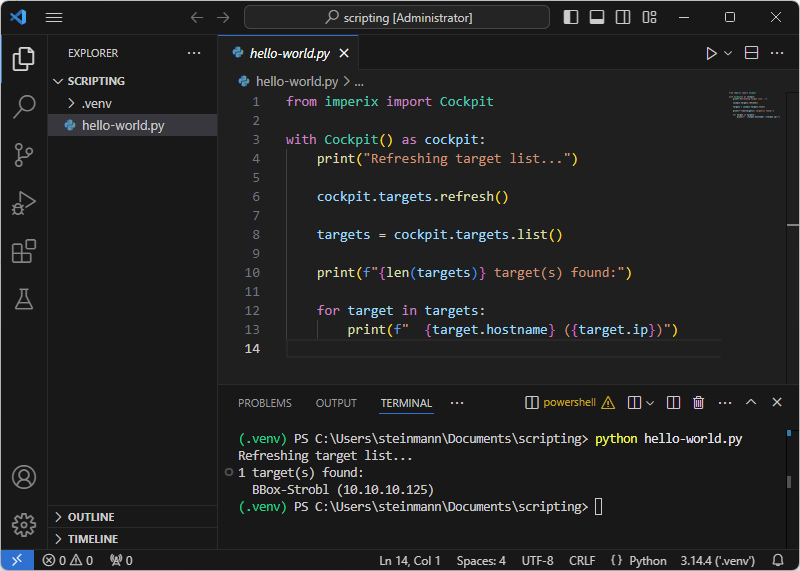
hello-world.py from Visual Studio CodeGoing further
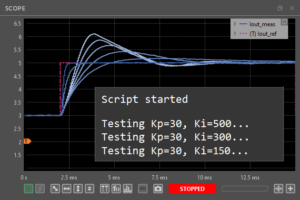
With the Python environment fully configured, the next step involves building and running automated control sequences. The PN205 example presents a complete script that updates the Kp and Ki parameters and acquires the resulting response to a current reference step. This example serves as a practical template for building automation sequences and provides guidelines on the following key concepts:
- Creating a project and launching user code.
- Configuring the Scope module.
- Performing the experiment and exporting the resulting acquired data .
 By Benoît Steinmann • September 14, 2026 • PN205
 By Stéphane Lovejoy • April 12, 2022 • PN300