Table of Contents
This page provides the source files, namely the imperix firmware IP and project template creation script, to start programming the FPGA on imperix devices. After a description of the archives content, step-by-step procedures explain how to generate a working Vivado project from the source files or from project-specific scripts provided in the Knowledge Base, and how to update the firmware for existing sandbox projects.
To learn how to use the imperix IP, please refer to the getting started with FPGA page and the imperix IP user guide page.
To find all FPGA-related notes, you can visit FPGA development homepage.
Downloads
| Compatible SDK versions | Gen 4 (B-Box 4) | Gen 3 (B-Box RCP 3.0,B-Box Micro, B-Board PRO, TPI8032) |
| 2026.1 | 4.0 Rev. 0 FPGA_Sandbox_template_4.0rev0.zip | 3.10 Rev. 3 FPGA_Sandbox_template_3.10rev3.zip |
| 2026.1 2025.2 2025.1 | Not applicable. | 3.10 Rev. 1 FPGA_Sandbox_template_3.10rev1.zip |
| 2026.1 2025.2 2025.1 2024.3 | Not applicable. | 3.10 Rev. 0 FPGA_Sandbox_template_3.10rev0.zip |
Change logs
New in 3.10 Rev. 0
- Repurposing the SFP ports
One or multiple SPF ports can now be detached from RealSync and the corresponding GTX transceivers accessed via additional ports on the imperix firmware IP. The SFP ports can therefore be used for custom communication, using Aurora 8B10B for instance. - Saving of FPGA resource
Unused modulators can bow be disabled in the imperix firmware IP, significantly reducing the resource consumption of the IP in the FPGA. Users with large custom FPGA designs might take advantage of it to extend their design even further.
New in 3.10 Rev. 1
- Improved configurability of the RES block
The resolution and excitation frequency of the resolver can now be changed. The default values are 12-bit and 10 kHz, as set in the previous firmware versions.
New in 3.10 Rev. 2
Internal version.
New in 3.10 Rev. 3
- Support for remote debugging over the network
Thanks to the support of Xilinx Virtual Cable (XVC), it is now possible to instantiate and connect to on-chip Integrated Logic Analyzer (ILA) cores via Ethernet. This provides access to the internal FPGA signals without any physical JTAG cable, greatly facilitating the debug of FPGA logic. - Propagation of Ethernet between devices at full gigabit speed
An upgrade of the Ethernet-over-RealSync protocol – from Mbps to Gbps – allows inter-device traffic to reach the Gigabit speed in master-slave and multi-master setups.
Archives content
Content structure
The content of the archives follows the following structure.
| /constraints/ | Constraints associated to the imperix firmware, mainly assignation of top-level ports to physical package pins. |
| /hdl/ | Ready-to-use VHDL helper modules, detailed in the next section, provided by imperix for convenience. |
| /ix_repo/ | imperix firmware under the form of an IP and related interfaces |
| /scripts/ | Generation scripts to automatically create, open and configure a ready-to-use Vivado project, simplifying the initial setup. |
| /vivado/ | Location of the projects created via the generation scripts from /scripts/. |

VHDL helper modules
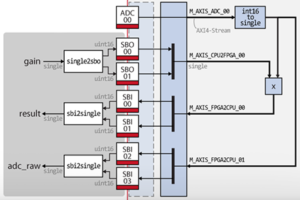
| AXIS_interface.vhd | Connects to the SBIO bus and ADC interface of the imperix firmware IP and provides the same access through AXI4-Stream interfaces. |
| AXIS_64_interface.vhd | Same module as the AXIS_interface.vhd, extended to 64 CPU2FPGA (SBO) and FPGA2CPU (SBI) registers. |
| AXIS_to_reg.vhd | Exposes AXI4-Stream input data through a simple, interface-free register, updating its value whenever the input data is valid. |
| resets.vhd | Generates reset pulses based on the firmware synchronization pulse and CPU state. |
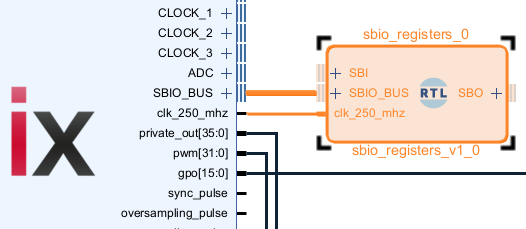
| sbio_registers.vhd | Connects to the SBIO bus interface of the imperix firmware IP, instantiates the SBIO registers and exposes them as ports for an easy access from the user logic. Works as a serial-to-parallel converter for the SBIO bus interface. |
| sbio_256_registers.vhd | Same module as the sbio_registers.vhd, extended to 256 CPU2FPGA (SBO) and FPGA2CPU (SBI) registers. |
| sbio_interconnect.vhd | Connects to the SBIO bus interface of the imperix firmware IP and splits the 1024-addresses range into four smaller 256-addresses ranges. |
| user_cb_pwm.vhd | Simple carrier-based modulator that basically takes a duty-cycle as input and produces the corresponding PWM outputs. |
Creating a new project
The creation of a new project can be achieved either manually, or through the provided generation scripts. Please refer to the desired creation procedure in the two following subsections.
Step-by-step project creation
To create the template manually, please extend the box below and follow the detailed procedure.
Create a project with the imperix firmware IP
- Open Vivado.
- Once open, click on Create Project.
- Chose a name and a location.
- Select project type RTL Project and check the box Do not specify sources at this time.
- Select the part named xc7z030fbg676-3.
- Hit Finish. The project should open.
- Go to the IP Catalog, right-click on Vivado Repository, hit Add repository…
Select<my_project>/ix_repo/
The IMPERIX_FW IP, clock_gen, and user_regs interfaces should be found. Press OK. - Click on Create block design, name it “top” and click OK.
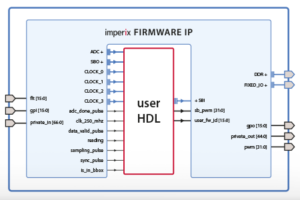
- Open the freshly created block design, do a right-click in a blank area of the design, select Add IP… and search for “IMPERIX_FW” and hit ENTER.
- Keep the [Ctrl] key pressed and select the IP pins
flt,gpi,private_in,DDR,FIXED_IO,BBOS,USR,gpo,pwmandprivate_out. Hit [Ctrl+T] to create top-level ports. - By default Vivado adds “_0” after each port name. Remove the “_0” from every port. For that, click on each port and change the name property in the Block Pin Properties block (appearing on the left of the diagram by default). For instance, change “
flt_0[15:0]” to “flt[15:0]“. - The
user_fw_idinput may be used to identify the firmware version. We recommend instantiating a Constant IP (Right-click, Add IP…, search for Constant) to give an identification number to the design. To change the constant width, double-click on the Constant block and set the Const Width to 16. - Go to the Sources tab, right-click on the block design file (top.bd) and select Create HDL Wrapper…
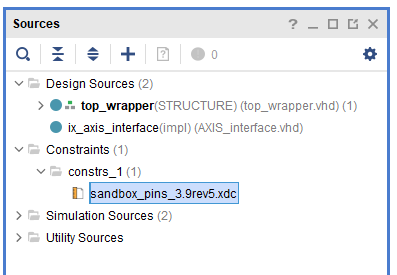
In the dialog box choose Let Vivado manage wrapper and auto-update and hit OK. - Right-click on the Design Sources folder. Choose Add Sources… and check Add or create constraints. Click on Add Files. Select
<my_project>/sandbox_pins.xdc. Uncheck Copy constraints files into project. Hit Finish.
Adding the AXI4-Stream interface
Adding the AXI4-Stream interface is optional. It is useful if the FPGA control design uses AXI4-Stream interfaces.
- Right-click on Design Sources
Choose Add Sources….
Check Add or create design sources. - Press Add Files. Go to your repository and select
<my_project>/AXIS_interface.vhd.
We recommend unchecking “Copy sources into project” and working directly from the files in the folder<my_project>/hdl/so the sources can be shared across multiple projects. Press Finish and wait for the update to finish. - Right-click somewhere in the block design and choose Add module… and select the ix_axis_interface module. Alternatively, the file listed in the Design Sources can be drag and dropped it on the block diagram.
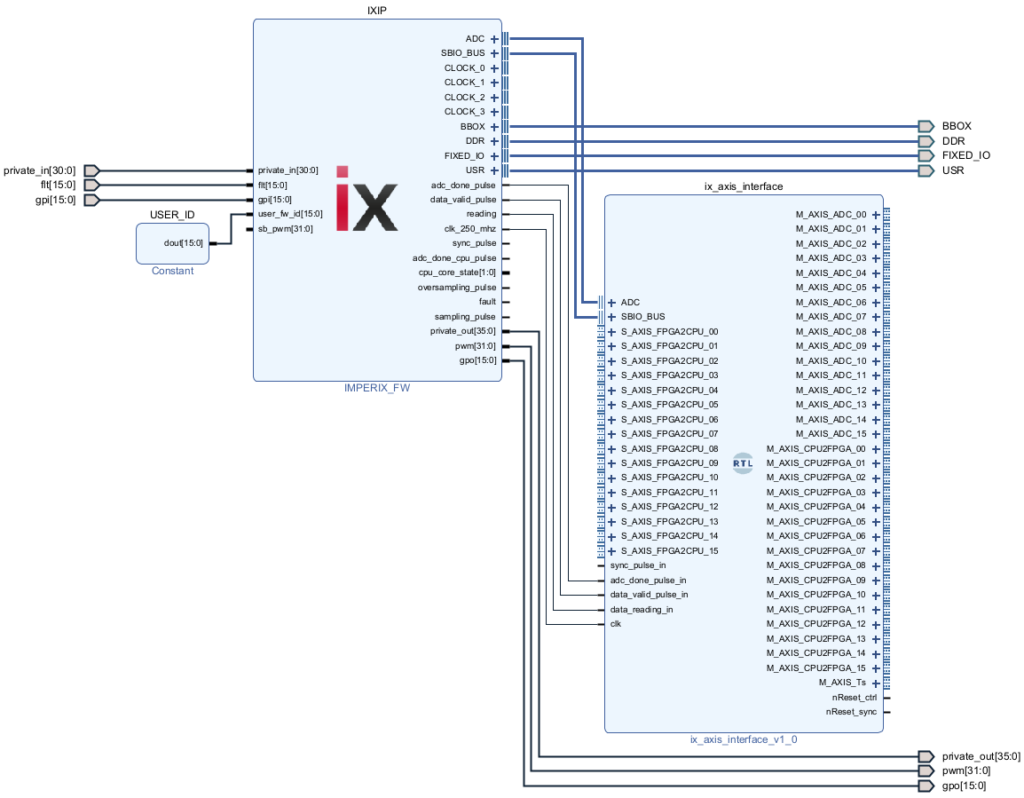
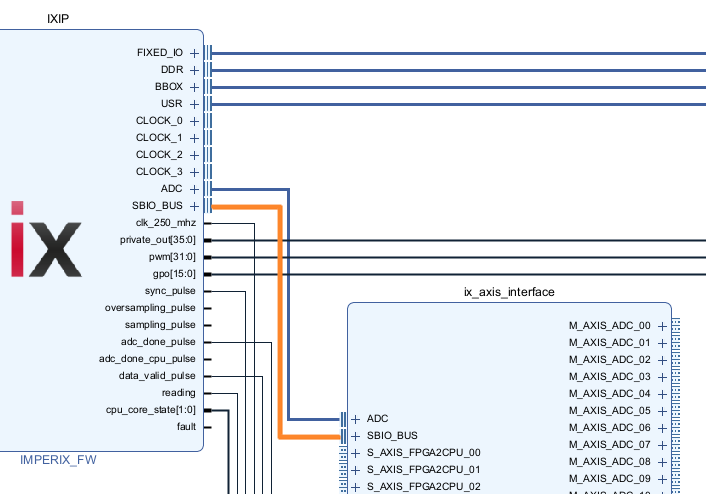
- Connect the pins as follows (to get a clear layout, change “Default View” to “No Loops” in the top bar of the Diagram block, then right-click somewhere in the block design and press Regenerate Layout).
Project creation using the generation scripts
To automatically generate the template project via the provided generation scripts, please follow the detailed procedure below.
- Download the sources files FPGA_Sandbox_template_*.zip archive.
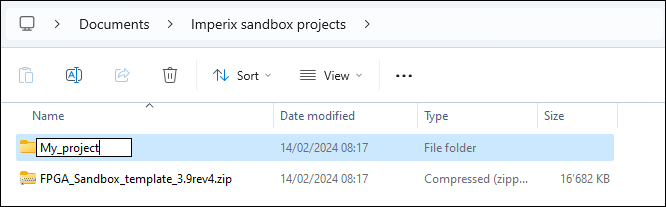
- Unzip it and save the content somewhere on the PC.
- Rename the folder to something more explicit.
- Open scripts/create_project.bat using a text editor.
- Set the vivado_path variable to match the Vivado version installed on the PC.

- Double click on scripts/create_project.bat. Windows Defender SmartScreen may display a warning pop-up. Simply click More info then Run anyway.
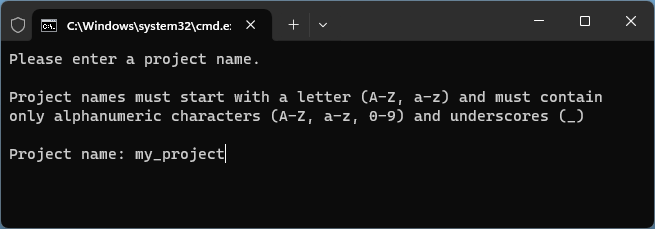
- Enter a project name and click Enter.
The Vivado sandbox project will be created and configured, its block design is shown below.

Starting from generation scripts
This section describes how to proceed when starting with a project-specific script downloaded on our Knowledge Base.
- Download the source files FPGA_Sandbox_template_*.zip archive.
- Unzip it and save the content somewhere on the PC.
- Rename the folder to something more explicit.
- Download the project-specific generation scripts on the page of interest in the Knowledge Base (e.g., aurora_ix_plexim_gen_scripts.zip in Aurora link with Plexim via SFP).
- Unzip it and open it.
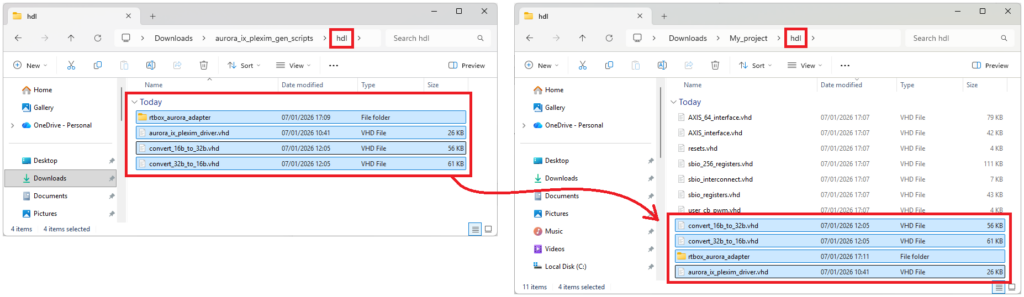
- Copy-paste the content of each subfolder into the corresponding subfolder of the source files (e.g., content of <scripts folder>/hdl/ into <source files>/hdl/, etc.). If any, the scripts in the top-level of the scripts folder must be placed in <source files>/scripts/.
- Double-click on the newly copied <source files>/scripts/<script_name>.bat file. Windows Defender SmartScreen may display a warning pop-up. Simply click More info then Run anyway.
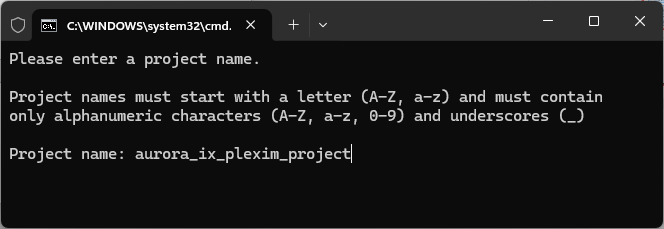
- Enter a project name and click Enter.
- Once the Vivado is created, click on Generate Bitstream. Vivado will proceed to the synthesis and implementation of the bitstream.
- Once generated, click on File > Export > Export Bitstream File and store the bitstream somewhere on the PC.
- Load the bitstream on the target with Cockpit.
- The FPGA is now ready to go.
- Next steps are generally to connect the physical setup, and download, build and load the Simulink (or PLECS) model for the CPU.
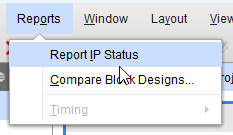
Upgrade procedure
This section describes how to upgrade the imperix IP from an existing Vivado project.
- Download the FPGA_Sandbox_template zip file for the targeted SDK version and unzip it.
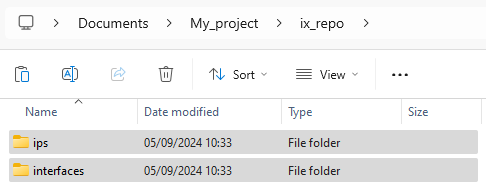
- In the <project_dir>/ix_repo/ directory, replaces the interfaces and ips folders with the ones from the freshly downloaded sandbox template.
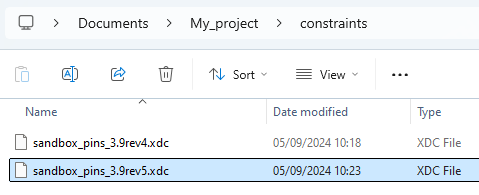
- Copy the new constraint file to <project_dir>/constraints/.
⚠️If modifications were made to the constraint file (e.g. to use USR pins), these modifications need to be reported to the new constraint file.
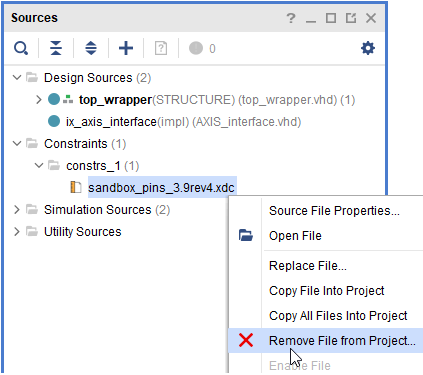
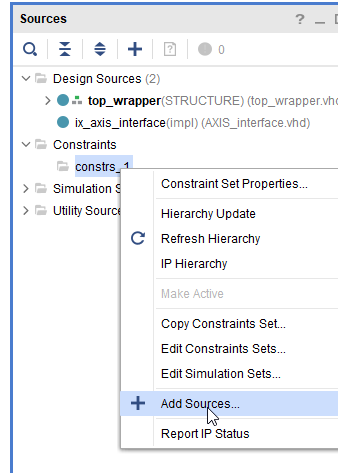
- Open the Vivado project. Remove the old constraint file and add the new one.
- Upgrade the imperix sandbox IP. It may generate warnings, which is expected.
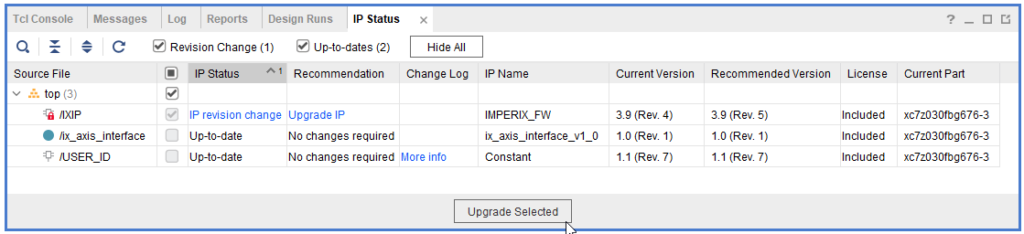
- Follow the expandable sections in the accordion below depending on the used imperix IP version.
When upgrading the imperix IP to version 3.9 Rev. 4 or later, the following changes must be made:
- The interface
BBOXwas added, make sure to connect it to the top-level interface
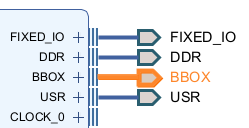
private_inandprivate_outsize changed, make sure to update the top-level ports accordingly

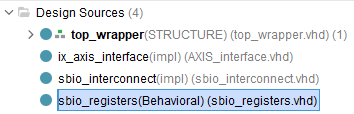
- After these changes, re-generate the top-level HDL wrapper. To make sure Vivado apply the change properly, we recommend deleting the
top_wrapper.vhdand re-create the HDL wrapper.
The imperix IP version 3.9 Rev. 5 brings the following changes. Additional information are provided after the procedure.
- The SBI and SBO interfaces were replaced by the memory-mapped SBIO_BUS.
The provided VHDL module sbio_registers.vhd makes the bridge between the SBIO_BUS and the traditional SBI and SBO interfaces that were present in the imperix IP 3.9 Rev. 4 and earlier - The sbio_interconnect .vhd was added for convenience
Upgrade procedure
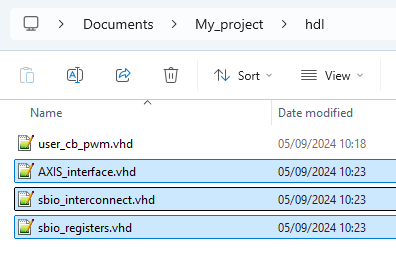
- In <project_dir>/ix_repo/
– replace AXIS_interface.vhd
– add sbio_interconnect.vhd and sbio_registers.vhd
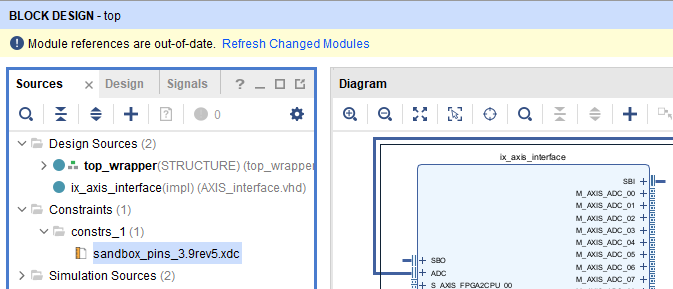
- If using the AXI-Stream interface (AXIS_interface.vhd)
In Vivado, click Refresh Changed Modules then reconnect the SBIO_BUS interface.
- If using SBI and SBO registers
The provided VHDL modulesbio_registers.vhdmakes the bridge between theSBIO_BUSand the traditionalSBIandSBOinterfaces that were present in the imperix IP 3.9 Rev. 4 and earlier.
Legacy IPs for older SDKs
| C++ or ACG SDK | imperix IP version | Minimal Vivado version required | Download |
| 2024.2 | 3.9 Rev. 5 | 2022.1 | FPGA_Sandbox_template_3.9rev5.zip |
| 2024.1 | 3.9 Rev. 4 | 2022.1 | FPGA_Sandbox_template_3.9rev4.zip |
| internal only | 3.9 Rev. 1 to 3 | 2022.1 | internal only |
| 3.8.x.x | 3.8 Rev. 1 | 2022.1 | sandbox_sources_3.8.zip |
| 3.7.x.x | 3.7 Rev. 1 | 2021.1 | sandbox_sources_3.7.zip |
| 3.6.x.x | 3.6 Rev. 1 | 2019.2 | sandbox_sources_3.6.zip |
| 3.5.x.x 3.4.x.x | 3.4 Rev. 1 | 2019.2 | sandbox_sources_3.4.zip |